Dividers
Dividers are added to the frame to make compartments.
Divider panels
Dividers are assembled from panel parts and caps. For each divider, print the
necessary panel parts, one left cap, CapL_Hh.stl, and one right cap,
CapR_Hh.stl, where h is the panel height, e.g. CapL_H5.stl. To
determine the required panel length, count the visible top squares holes in a
panel that runs parallel to the planned divider, substracting two to account for
the caps and grooves.
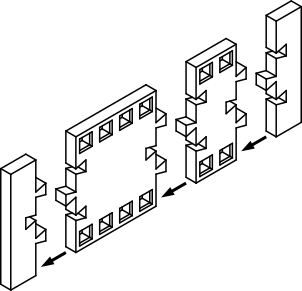
Divider assembly
Grooves
Grooves are connected to panels with pegs. For each divider, print two grooves,
Groove_Hh_Ii.stl, where h and i are the panel height (in cm). (See
Mixing panel heights for the distinction between h and i.) Two
round pegs are also needed for each groove, and are provided in the 8-peg
cluster, Peg_x8.stl.
To facilitate pushing pegs into a groove, first put the pegs in a panel part lying flat (a). Then, push the groove down onto the pegs (b).
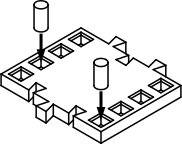 (a) Putting the pegs in a panel part
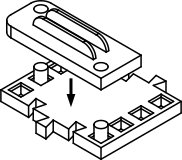 (b) Pushing a groove onto the pegs
Groove assembly
Insert the grooves in the frame, opposite one another (a). Then, slide in the divider (b).
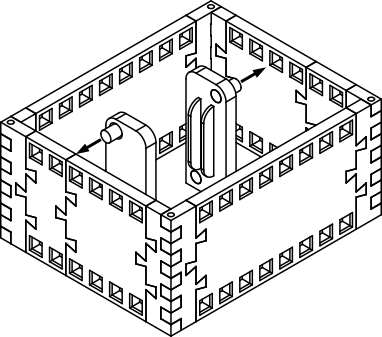 (a) Inserting grooves in the frame
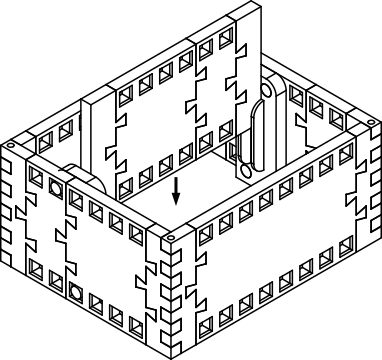 (b) Sliding a divider into grooves
Groove and divider insertion
Subdividing the organiser
Corners, caps and grooves are designed so that parallel panels are always spaced by an integer number of cm, measured between panel centres. As a consequence, dividers can be added to the frame and to other dividers as desired, until a compartment is too small to be further subdivided.
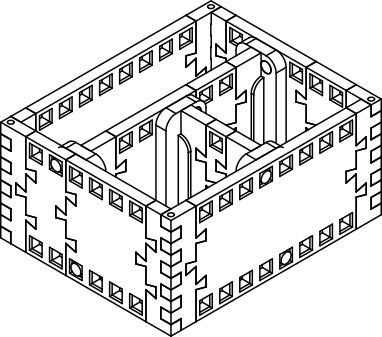
Subdivided organiser
Mixing panel heights
Dividers of different heights can be used in the same organiser, the only restriction being that a divider can be added to a panel only if that panel is taller or of the same height. This implies that no divider can be taller than the organiser’s frame. While taller compartments are more sturdy, shorter panels make it easier to pick objects up.
To insert a divider of height i into a taller panel of height h, use the
corresponding Groove_Hh_Ii.stl part.
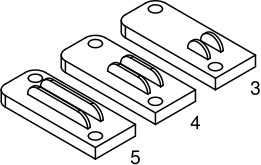
All possible 5-cm-high grooves (i in cm)
Grooves for 3-cm inserts are used with Waves rather than dividers.